Add code to header.php
1. Open header.php file located in your child theme folder.
* If you do not have header.php file in you child theme folder, then copy it from parent Divi theme and paste to your child theme folder.
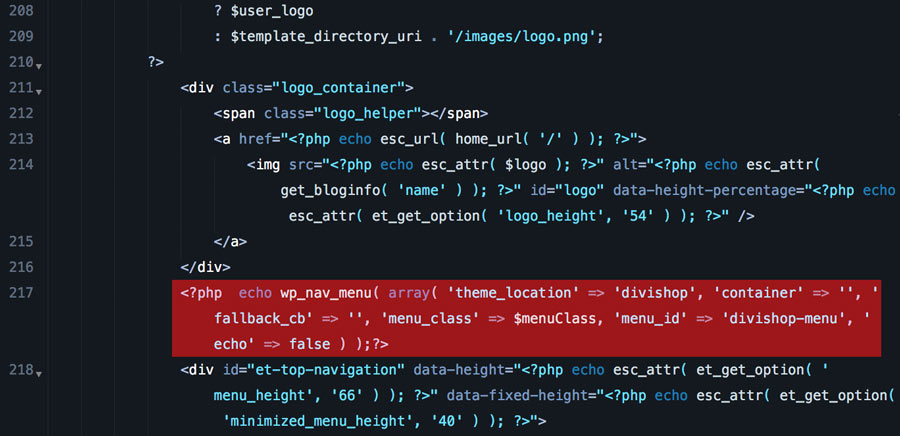
2. Add the following code below logo_container div:
1 2 3 | <?php echo wp_nav_menu( array( ‘theme_location’ => ‘divishop’, ‘container’ => ”, ‘fallback_cb’ => ”, ‘menu_class’ => $menuClass, ‘menu_id’ => ‘divishop-menu’, ‘echo’ => false ) );?> |
Add custom js
Create js folder in your child theme root directory and create divicustom.js file inside it. Add below code and save:
1 2 3 4 5 6 7 8 9 10 11 12 13 14 15 16 | $divishop = jQuery(‘#divishop-menu’); if ( $divishop.length ) { jQuery(window).scroll(function() { var scroll = jQuery(window).scrollTop(), objectPosition = $divishop.offset().top; var divishopwidth = jQuery(‘#divishop-menu’).width(); if (scroll > 400) { jQuery(‘body’).addClass(“et_divishop_cta”); } else { jQuery(‘body’).removeClass(“et_divishop_cta”); } }); } |
Edit functions.php file
In this step we need to enqueue js file that we created in previous step and register function. Open functions.php and add the following code:
1 2 3 4 5 6 7 8 9 10 11 12 13 14 15 | add_action( ‘wp_enqueue_scripts’, ‘my_enqueue_assets’ ); function my_enqueue_assets() { wp_enqueue_script(‘divicustom’, get_stylesheet_directory_uri() . ‘/js/divicustom.js’, array(), ”, true); } add_action( ‘after_setup_theme’, ‘b3_shop_register_menu’ ); function b3_shop_register_menu() { register_nav_menu( ‘divishop’, __( ‘Shop Menu’) ); } |
Add CSS styles
Add below code to style.css located in you child theme folder:
1 2 3 4 5 6 7 8 9 10 11 12 13 14 15 16 17 18 19 20 21 22 23 24 | /*Menu Slide in effect*/ @media only screen and (min–width: 981px) { .shop–show–hide–desktopmobile {display:none !important;} ul#top-menu li.menu-item:nth-last-child(2) {padding-right:0px !important;} ul#divishop-menu {background: #fff;float: right;font-size: 15px;list-style: none;margin-right: -200px;margin-left: 20px !important;right: 0;z-index: 99;} ul#divishop-menu li {background: #fff;float: left;display: inline-block;font-size: 14px;text-transform:uppercase;} ul#divishop-menu a {color: #666666;display: block;line-height: 16px;padding: 24px 18px;text-decoration: none;font-size: 13px;font-weight: 600;} .et_divishop_cta .shop–float–in {overflow: hidden;transition: all 2.9s ease–out 0s !important;} .shop–float–in {transition: all 2.9s ease–out 0s !important;} ul#divishop-menu .shop-float-in a:hover {text-decoration: none;} ul#divishop-menu li.shop-cta{background: #1e88e5; position: relative;} ul#divishop-menu li.shop-cta:hover{background: #0055a5;} ul#divishop-menu li.shop-cta a{color: #FFFFFF;padding:25px 50px;} .et_divishop_cta #access-menu{margin-right: 25px;transition: all .6s ease-out 0s !important;} .et_divishop_cta ul#divishop-menu {margin: 0 -30px 0 0;} #main-header .et_menu_container,#divishop-menu,#access-menu,#et-top-navigation,.et_fixed_nav #et-top-navigation{ transition: all .4s ease-out 0s !important;} } @media only screen and (max–width: 980px) { ul#divishop-menu {display:none;} } |
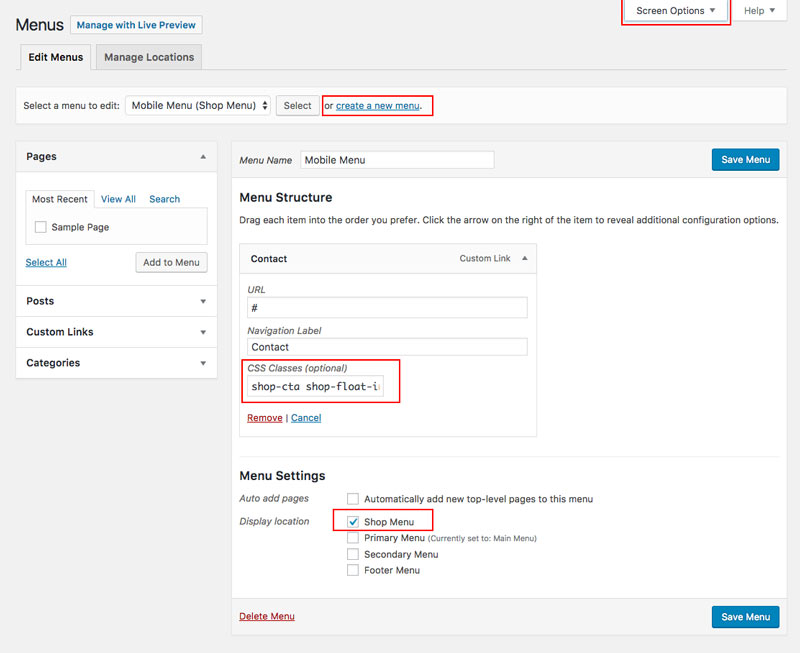
Create New Menu
1. Go to Appearance/Menus and create new menu.
2. Add menu item you would like to have animated.
3. Add class shop-cta shop-float-in and select Shop Menu below, Save.
* If you do not see CSS Class field then it means it is not enabled. To fix it click on Screen Options located in top right corner and select CSS Classes
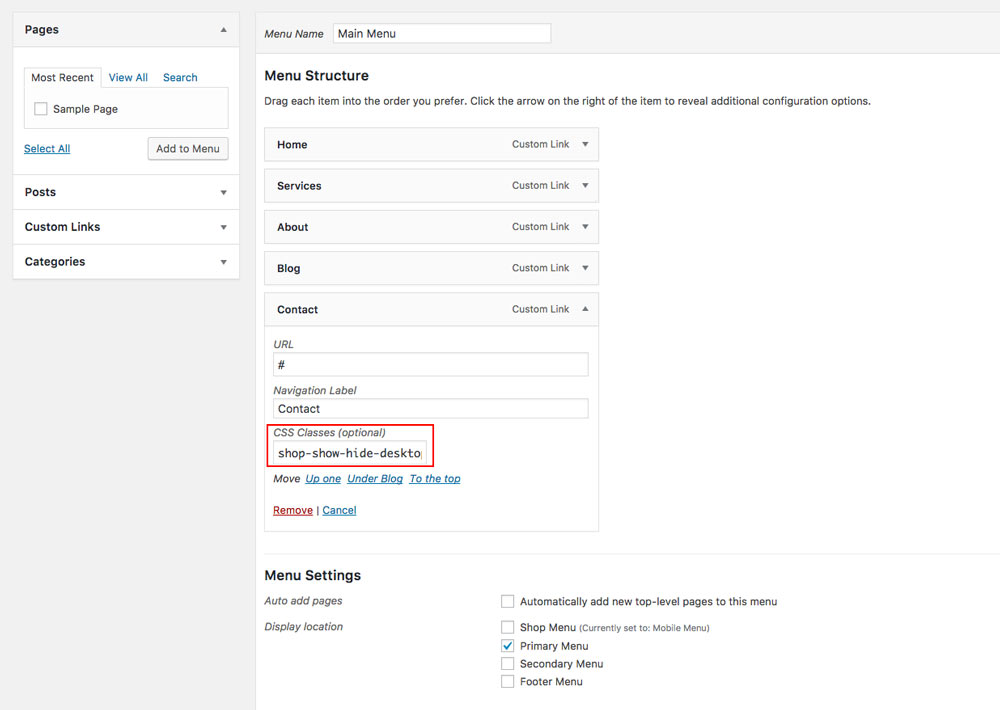
Edit Primary Menu
1. Go to Appearance/Menus and select Primary Menu
2. Add class shop-show-hide-desktopmobile to the item you want to have animated
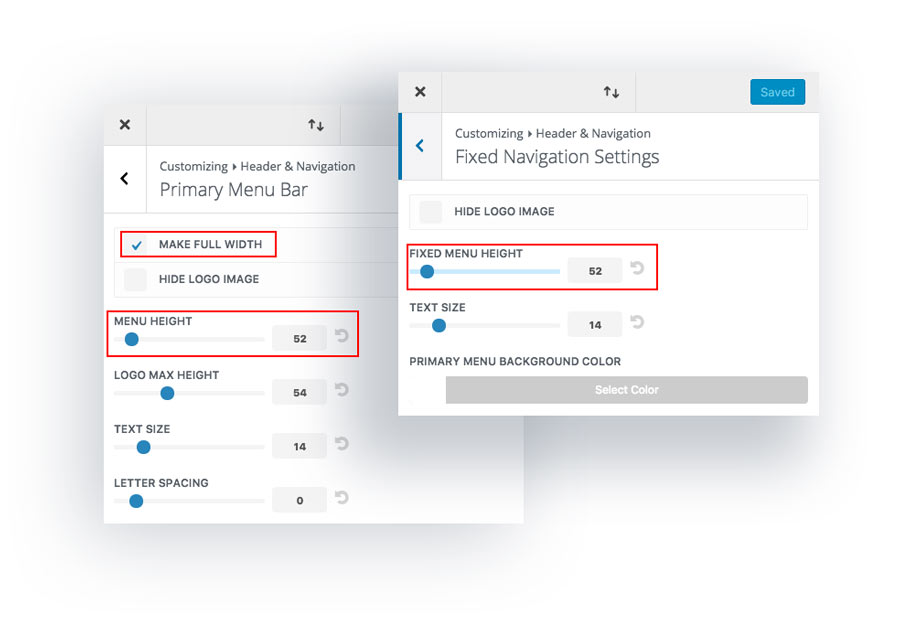
Edit Customizer Settings
Primary Menu Bar:
1. Got to Divi/Theme Customizer
2. Select Header & Navigation/Primary Menu Bar
3. Select Make Full Width option and set Menu Height to 52
Fixed Navigation Settings:
1. Select Header & Navigation/Fixed Navigation Settings
2. Set Fixed Menu Height to 52